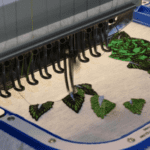
Embroidery machines can turn your creative visions into stunning reality, but technical hiccups often stand between you and perfect stitching. This guide helps home sewers, small business owners, and embroidery enthusiasts troubleshoot the most frustrating machine problems that pop up during projects.
You’ll discover how to fix common thread tension issues that create loose or puckered stitches, plus learn why needles break and how to prevent it from happening again. We’ll also walk through bobbin problems that cause messy backing and show you the right way to hoop fabric for professional looking results.
Common Thread Tension Issues and Quick Fixes
 Identifying Loose or Tight Thread Problems
 Identifying Loose or Tight Thread Problems
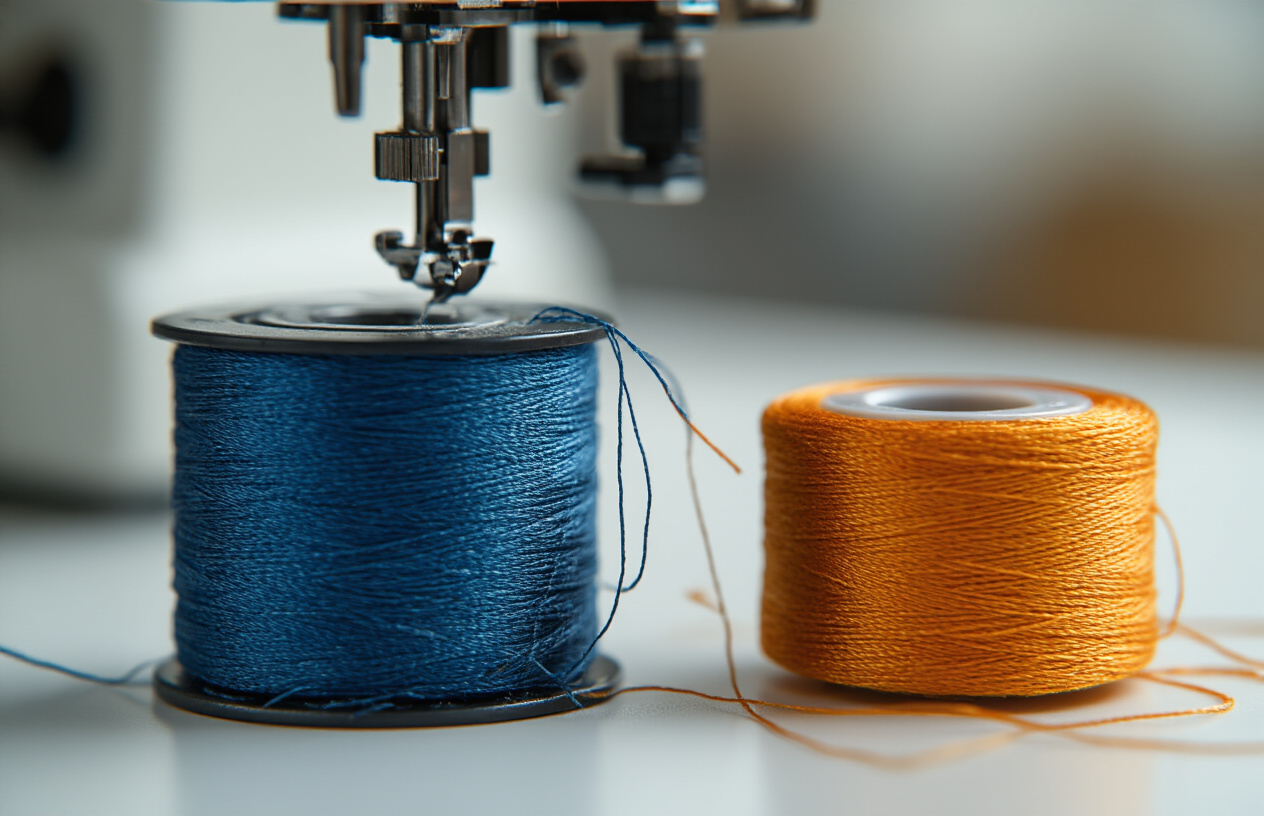
Thread tension problems show up in several telltale ways on your finished embroidery. Loose upper thread tension creates loops on the bottom of your fabric, making stitches look messy and unprofessional. You’ll notice the bobbin thread pulling through to the top surface, creating visible dots or lines where it shouldn’t appear.
Tight upper thread tension pulls the bobbin thread up to the fabric’s surface, creating puckering and distortion. The fabric bunches up around stitches, and you might see the bobbin thread color bleeding through on top. Your embroidery will feel stiff and may cause the fabric to wrinkle permanently.
Check your work frequently during stitching by lifting the hoop slightly. Good tension produces flat, even stitches with no visible bobbin thread on top and smooth backing without loops or bunching.
Adjusting Upper Thread Tension Settings
Start with your machine’s default tension setting, usually marked with a colored dot or number on the tension dial. Most embroidery machines work best between settings 3-5, but this varies by thread type and fabric weight.
For cotton and polyester threads on medium-weight fabrics, begin at tension setting 4. If you see bobbin thread on the fabric surface, gradually decrease the tension by small increments (quarter turns). When loops appear on the backing, increase tension slowly until they disappear.
Different thread materials need different settings. Metallic threads require lower tension (2-3) because they’re more delicate. Thick specialty threads need slightly higher tension (4-5) to penetrate fabric properly. Keep a tension chart noting successful settings for your favorite thread and fabric combinations.
Checking Bobbin Thread Tension
Bobbin tension stays consistent more often than upper thread tension, but it still needs occasional checking. Hold your bobbin case with threaded bobbin and let it dangle. The bobbin should drop slowly when you jerk the thread gently – about 2-3 inches before stopping.
If the bobbin drops too quickly, the tension is too loose. If it doesn’t drop at all, it’s too tight. Adjust using the small screw on the bobbin case, turning clockwise to tighten and counterclockwise to loosen. Make tiny quarter turn adjustments only.
Pre wound bobbins often have different tension characteristics than hand-wound ones. Stick with one type for consistency, and always use the same bobbin thread weight throughout your project.
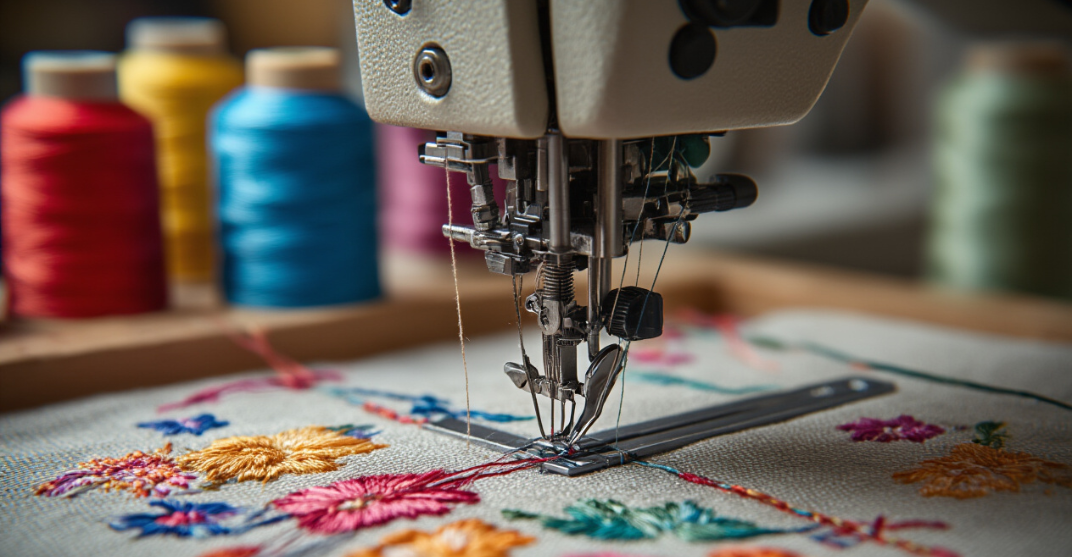
Preventing Thread Breakage During Stitching
Thread breaks happen when tension is too tight, but other factors contribute too. Check your thread path for snags, rough spots, or improper threading. The thread should flow smoothly from spool to needle without catching on guides or tension discs.
Use the right needle size for your thread weight. Size 75/11 needles work for most standard embroidery threads, while metallic threads need 90/14 needles with larger eyes. Dull or damaged needles cause thread fraying and breakage.
Slow down your stitching speed for problem threads. Metallic and specialty threads perform better at 400-600 stitches per minute rather than maximum speed. Keep thread spools vertical on thread stands to prevent twisting, and replace old thread that’s become brittle or fuzzy.
Needle Problems That Ruin Your Embroidery Projects
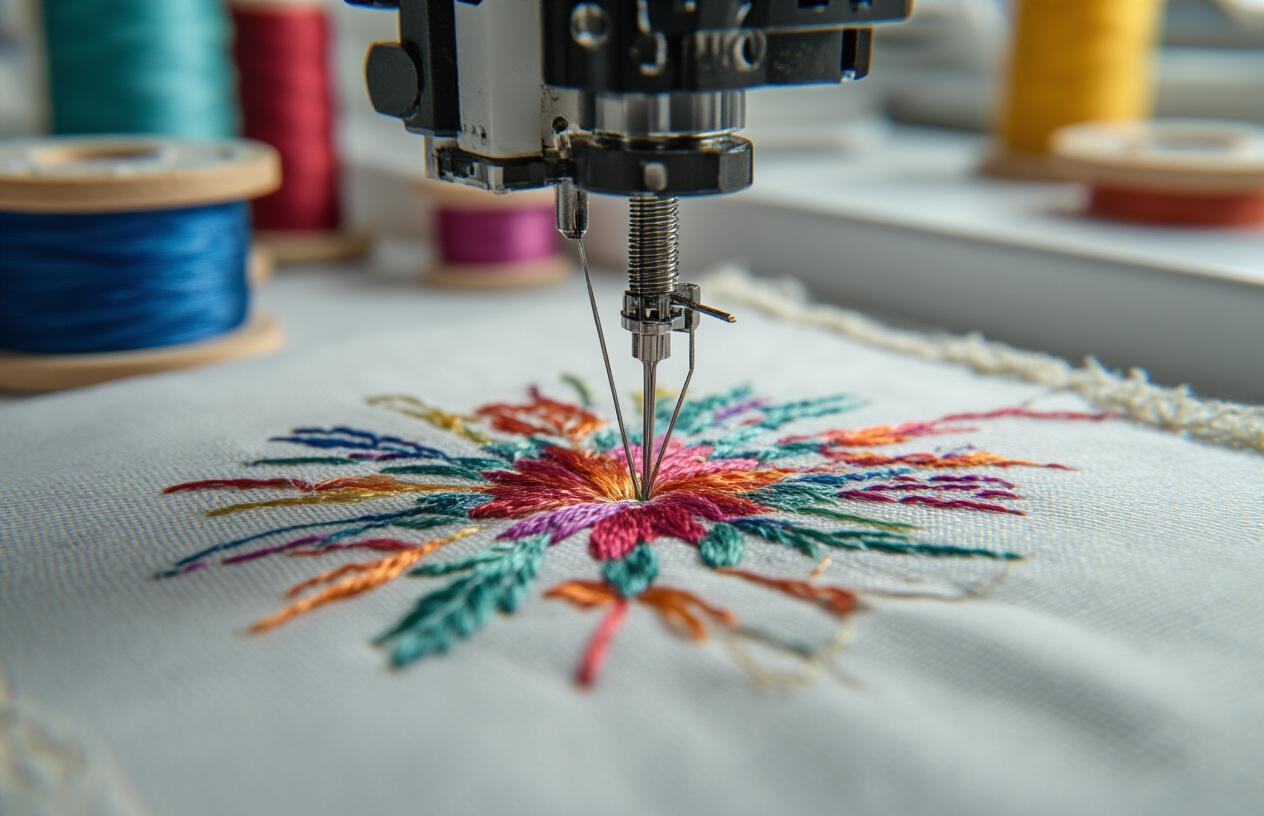
Recognizing Dull or Damaged Needle Symptoms
Sharp embroidery needles are your best friend, but dull ones will sabotage every project. When your needle starts going bad, you’ll notice several telltale signs that demand immediate attention. The fabric begins making popping or tearing sounds as the needle punches through this happens because a dull needle can’t penetrate cleanly anymore and forces its way through the weave.
Watch for irregular stitch formation where some stitches appear loose while others pull too tight. Dull needles create inconsistent tension because they drag through the fabric instead of gliding smoothly. You might also see thread shredding or breaking frequently, especially with delicate threads like rayon or polyester.
Damaged needles show different symptoms. Bent needles create skipped stitches and can damage your machine’s timing. Burrs or rough spots on the needle shaft will snag threads and create fuzzy, uneven stitching. If you hear unusual clicking or grinding sounds from your machine, stop immediately – your needle might have a chip or crack that could damage the bobbin case.
Visual inspection reveals a lot too. Hold your needle up to the light and look for any bends, chips, or dullness at the point. A sharp needle point should look perfectly straight and come to a fine, clean point without any visible wear or damage.
Choosing the Correct Needle Size for Different Fabrics
Needle size makes or breaks your embroidery quality, and matching the right size to your fabric prevents most stitching disasters. The numbering system might seem confusing, but it’s pretty straightforward – smaller numbers mean finer needles, larger numbers mean thicker ones.
For lightweight fabrics like cotton lawn, silk, or chiffon, use 75/11 needles. These delicate materials need gentle penetration to avoid puckering or creating visible holes. Medium-weight fabrics such as cotton poplin, denim, or canvas work best with 90/14 needles, which provide enough strength to penetrate without being too aggressive.
Heavy fabrics like leather, thick denim, or multiple fabric layers require 100/16 or even 110/18 needles. Don’t try to force a small needle through thick material – you’ll end up with bent needles and skipped stitches.
| Fabric Weight | Needle Size | Best For |
|---|---|---|
| Lightweight | 75/11 | Silk, chiffon, cotton lawn |
| Medium | 90/14 | Cotton poplin, most quilting cottons |
| Heavy | 100/16 | Denim, canvas, multiple layers |
| Extra Heavy | 110/18 | Leather, thick upholstery |
Thread type also influences needle choice. Metallic threads need special metallica needles with larger eyes and special coatings. Thick decorative threads require larger needle sizes to accommodate the thread diameter.
Replacing Needles to Prevent Skipped Stitches
Changing needles regularly keeps your embroidery looking professional and prevents frustrating problems mid-project. Most embroidery experts recommend changing needles after every 8-10 hours of stitching time, but pay attention to your specific conditions.
Dense designs with lots of stitches wear needles faster than simple designs. Tough fabrics like denim or canvas dull needles quicker than soft cottons. If you’re working with metallic threads or doing a lot of detailed work, change needles more frequently.
The replacement process is straightforward but requires attention to detail. Turn off your machine and raise the needle to its highest position. Loosen the needle clamp screw don’t remove it completely, just enough to release the needle. Pull the old needle straight down and out.
Insert the new needle with the flat side facing away from you (toward the back of the machine). Push it all the way up into the clamp until it stops, then tighten the screw firmly. A loose needle will cause timing problems and potentially damage your machine.
Keep a needle log if you do lots of embroidery. Track when you change needles, what fabrics you’ve worked with, and any problems you encountered. This helps you spot patterns and optimize your needle change schedule for better results.
Bobbin Malfunctions and Simple Solutions
Fixing Bobbin Winding Irregularities
When your bobbin winds unevenly, creating loose or tight spots, your embroidery quality takes a hit. Start by checking if you’re using the correct bobbin type for your machine – different brands require specific bobbin styles, and using the wrong one causes immediate winding problems.
Remove any old thread completely before winding new thread. Leftover thread creates bumps and uneven surfaces that throw off the entire winding process. Thread the bobbin winder following your machine’s specific path – skipping guides or threading incorrectly leads to irregular tension during winding.
Wind bobbins at medium speed rather than rushing through at high speed. Fast winding creates loose spots and can stretch the thread. Hold slight tension on the thread as it winds, but don’t pull too hard. The bobbin should fill evenly from side to side, creating a neat, compact surface.
Replace worn bobbin cases that have nicks or rough spots. These imperfections catch thread during winding and create irregular patterns. Clean the bobbin winding mechanism monthly with a small brush to remove lint and thread debris.
Resolving Bobbin Case Alignment Issues
Proper bobbin case alignment directly impacts your embroidery’s bottom appearance and prevents frequent thread breaks. When installing the bobbin, the thread should pull from the bobbin in the correct direction – typically counterclockwise for most machines, but check your manual for specific requirements.
The bobbin should sit flush in the case without wobbling or sitting too high. If it rocks back and forth, you’re likely using the wrong bobbin type or the case has worn spots. Listen for smooth operation – grinding or clicking sounds indicate alignment problems.
Check the bobbin case spring tension regularly. The spring should hold the thread with consistent pressure, not too tight that it restricts flow, and not too loose that it creates loops on the fabric’s underside. Most machines have a small screw that adjusts this tension – make quarter-turn adjustments only and test between changes.
When reinserting the bobbin case into the machine, align the timing marks or notches precisely. Misalignment by even a fraction causes timing issues that result in skipped stitches or thread breaks. The case should click into place securely without forcing.
Cleaning Bobbin Area for Smooth Operation
Regular bobbin area maintenance prevents 80% of embroidery machine problems. Power off your machine completely before cleaning and remove the needle, presser foot, and throat plate to access the bobbin area fully.
Use a small brush or compressed air to remove lint buildup from every crevice. Lint accumulates quickly during embroidery projects, especially when working with fuzzy fabrics or metallic threads. Pay special attention to the bobbin race – the circular track where the bobbin case sits. Even small lint particles here cause timing issues.
Clean the bobbin case itself with a dry brush, checking for thread fragments caught in the spring mechanism. Never use oil or lubricants on the bobbin case unless specifically recommended by your manufacturer. Most modern machines use self-lubricating materials that oil actually damages.
Wipe down all metal surfaces with a dry cloth, checking for rough spots or burrs that could catch thread. Replace worn throat plates that have enlarged needle holes – these allow thread to get pulled into gaps, causing jams.
Schedule deep cleaning weekly for heavy users or monthly for occasional embroiderers. This simple maintenance routine extends your machine’s life and maintains consistent stitch quality.
Troubleshooting Bobbin Thread Jamming
Thread jams in the bobbin area typically stem from incorrect threading, wrong thread types, or mechanical issues. When jams occur, never force the handwheel or pull aggressively on jammed thread this can damage delicate timing mechanisms.
Power off the machine and remove the embroidery hoop before addressing jams. Cut the top thread near the needle and carefully remove the bobbin case. Gently pull out tangled thread, working in the direction it naturally wants to go. Forcing thread against its natural path can jam it deeper.
Check your bobbin thread type and weight. Heavy threads or poor-quality threads with thick spots jam more frequently. Use embroidery weight bobbin thread that matches your top thread weight. Avoid household sewing thread for embroidery projects it lacks the consistency needed for high speed operation.
Verify that the bobbin thread pulls smoothly from the case with light tension. Thread that flows too freely creates loops, while thread that pulls too hard creates excessive tension and potential jams. Adjust the bobbin case tension screw in small increments to achieve proper flow.
Examine your embroidery design density and stitch types. Extremely dense designs or too many jump stitches can cause thread buildup that leads to jams. Reduce design density or add more spacing between design elements to prevent thread accumulation in the bobbin area.
Fabric Hooping Mistakes and Professional Techniques
Achieving Proper Fabric Tension in Hoops
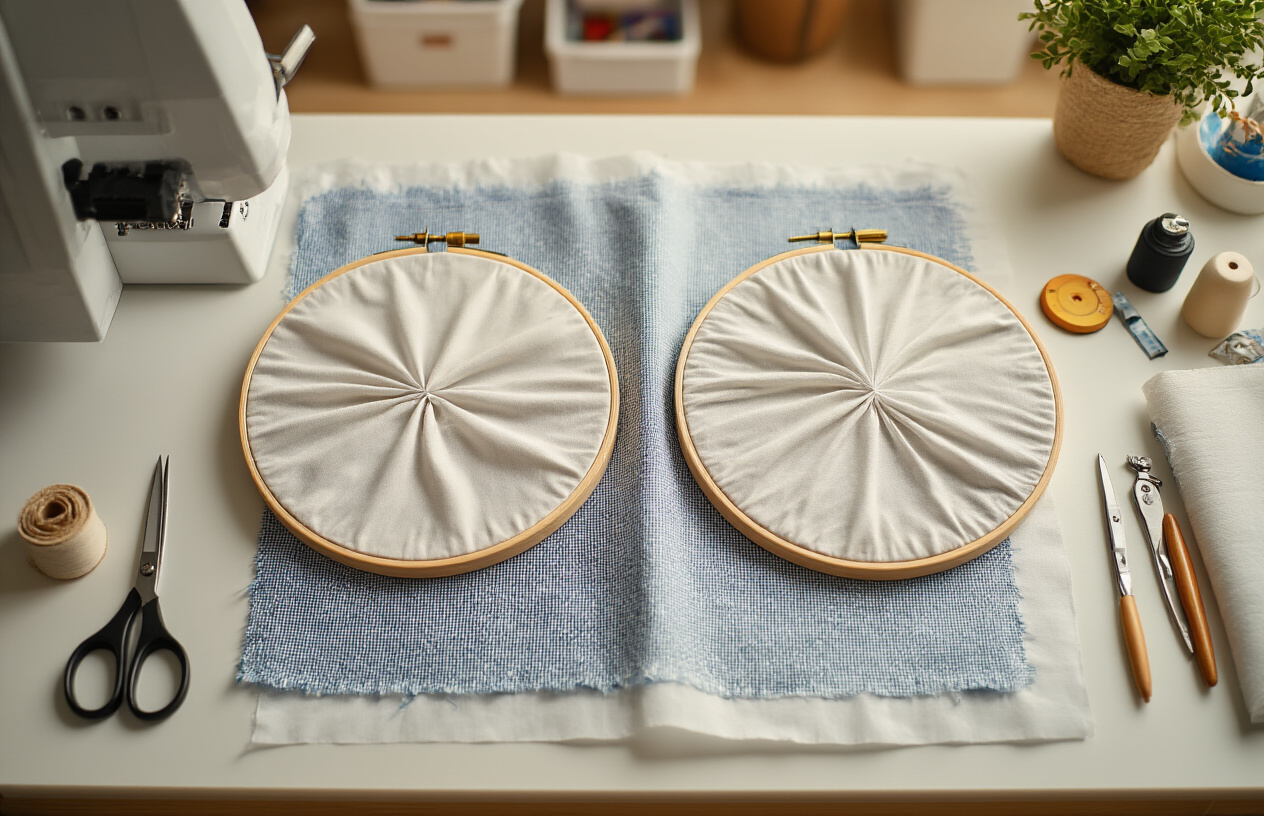
The key to professional embroidery results lies in getting your fabric tension just right. Your fabric should feel like a drum when tapped tight enough to prevent sagging, but not so tight it distorts the weave. Start by placing your fabric over the inner hoop, then pressing the outer hoop down evenly. Work your way around the hoop, gently pulling the fabric to eliminate wrinkles while maintaining consistent tension.
Avoid yanking or stretching the fabric aggressively, as this can cause permanent distortion. Instead, use a gentle tugging motion, checking that the grain lines remain straight. For stretchy fabrics like jersey or lycra, be extra careful not to over stretch, as this leads to registration problems during stitching.
Selecting Appropriate Stabilizers for Different Projects
Choosing the right stabilizer makes the difference between amateur and professional looking embroidery. Cutaway stabilizers work best for stretchy fabrics and high stitch count designs. They provide permanent support and prevent distortion during washing.
Tearaway stabilizers suit woven fabrics and lighter designs. They’re perfect for cotton shirts or canvas bags where you want clean removal without residue.
Washaway stabilizers excel with delicate fabrics like silk or when working on items where no backing should remain. They dissolve completely in water, leaving no trace.
| Fabric Type | Recommended Stabilizer | Weight |
|---|---|---|
| Cotton/Denim | Medium-weight tearaway | 2.5 oz |
| Knits/Jerseys | Medium cutaway | 2.0 oz |
| Silk/Delicates | Light washaway | 1.5 oz |
| Towels/Terry | Heavy cutaway + topping | 3.0 oz |
Preventing Fabric Puckering and Distortion
Puckering happens when your fabric-stabilizer combination can’t handle the thread tension and stitch density. Dense designs need stronger stabilizer backing, while light designs can get away with minimal support.
Check your needle size – too large creates holes that pucker, too small causes thread shredding. Match needle size to thread weight and fabric density. Sharp needles work for woven fabrics, while ballpoint needles prevent runs in knits.
Slow down your machine speed for dense areas. High speeds create heat buildup that can distort synthetic fabrics. Modern machines handle speed adjustments automatically, but older models benefit from manual speed control during critical sections.
Securing Delicate Fabrics Without Damage
Delicate fabrics need special handling to prevent hoop marks and fabric damage. Use a layer of tissue paper or washaway stabilizer between the hoop and fabric. This creates a buffer that prevents the hoop from marking the fabric directly.
For extremely delicate items like vintage linens or wedding dresses, consider the “float” method. Hoop only the stabilizer, then baste the fabric on top. This eliminates hoop pressure entirely while maintaining proper positioning.
Magnetic hoops offer another solution for delicate work. They eliminate metal rings that can snag or mark fabrics. The magnetic force holds fabric securely without crushing delicate fibers or leaving permanent impressions.
When working with pile fabrics like velvet or corduroy, brush the nap in one direction before hooping. This prevents crushing and ensures even stitch formation across the surface texture.
Design Transfer and File Format Problems
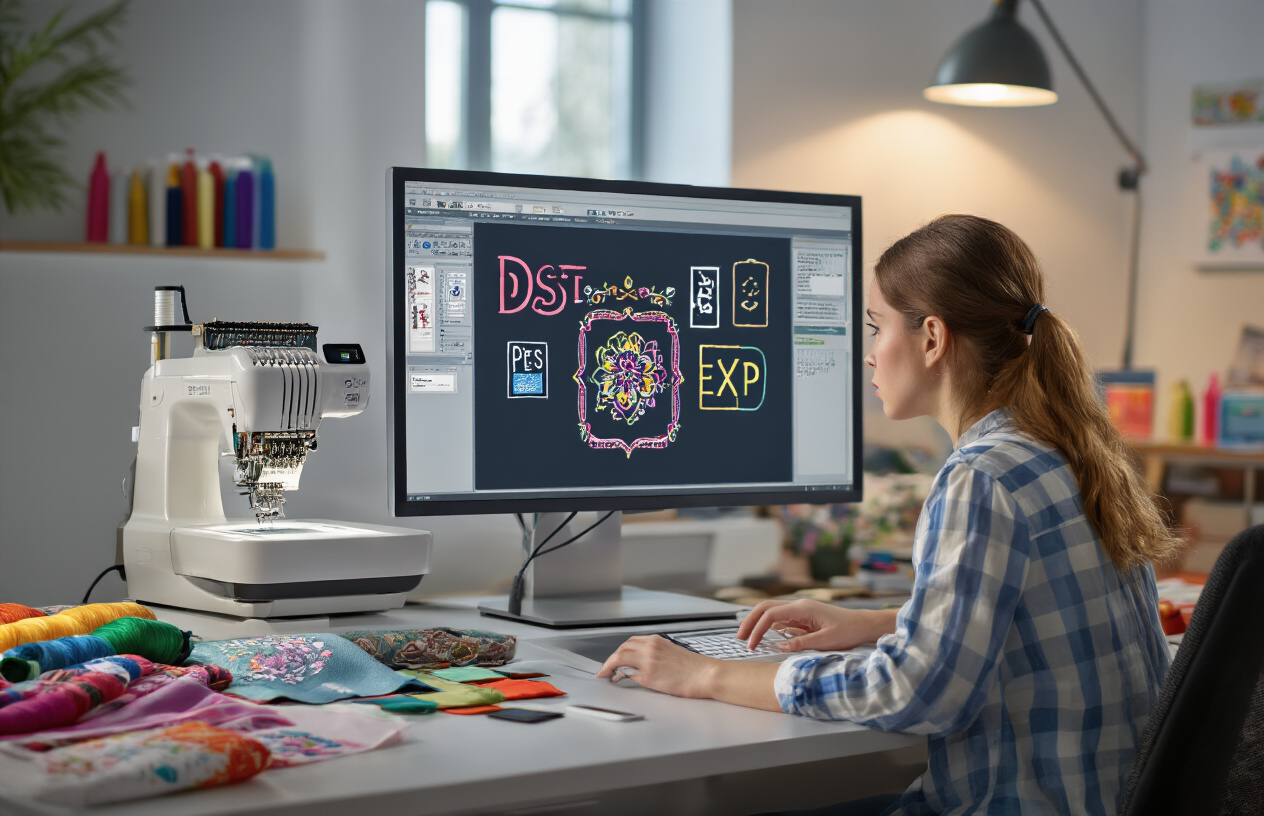
Converting incompatible embroidery file formats
Machine embroidery files come in dozens of different formats, each tied to specific brands and software. The most common formats include PES (Brother), HUS (Husqvarna), EXP (Melco), JEF (Janome), and DST (universal format). When you download a beautiful design only to discover it won’t work with your machine, format conversion becomes your best friend.
Free conversion tools like Embird Viewer or online converters can handle basic format changes. However, these simple converters often strip away important stitch data, color information, or jump commands that make your design look professional. For better results, invest in conversion software like Embird, PE-Design, or Wilcom’s TrueSizer.
Professional conversion software maintains thread density, stitch angles, and color sequences during the conversion process. These programs also let you preview the design before saving, catching potential issues early. Always keep a backup of your original file format – some conversions can’t be perfectly reversed.
Pay attention to stitch counts when converting. Different machines have varying maximum stitch limits, typically ranging from 100,000 to 500,000 stitches. If your converted design exceeds your machine’s capacity, you’ll need to split it into multiple files or simplify the design.
sizing designs without losing quality
Resizing embroidery designs isn’t like scaling a photo – simply making a design bigger or smaller often creates serious problems. Embroidery designs are built with specific stitch densities and underlay patterns that work at their intended size. Resize carelessly, and you’ll end up with thread breaks, puckering, or designs that look completely different.
The golden rule: never resize more than 20% up or down from the original size. Beyond this range, stitch density becomes problematic. When you make a design larger, the stitches spread out, creating gaps in coverage. Make it smaller, and stitches bunch together, causing thread buildup and potential jamming.
Professional embroidery software handles resizing much better than basic conversion tools. Programs like Wilcom, Pulse, or Brother PE-Design automatically adjust stitch density, underlay patterns, and small details when resizing. They can also identify problem areas where manual editing might be needed.
For significant size changes, consider having the design professionally digitized at the new size. This ensures optimal stitch placement, proper density, and maintains the design’s visual impact. Many digitizing services offer resizing for $10-30, which is often worth the investment for important projects.
Always test resized designs on scrrap fabric first. Different fabric types respond differently to density changes, and what works on cotton might not work on fleece or denim.
Fixing corrupted or incomplete design files
Corrupted embroidery files show up in frustrating ways: missing color changes, incomplete sections, random jump stitches, or files that simply won’t load. These problems often stem from interrupted downloads, storage issues, or compatibility problems between different software versions.
Start troubleshooting by re-downloading the file from the original source. Many corruption issues happen during download, especially with slower internet connections or when downloads are interrupted. If you purchased the design, most vendors allow multiple downloads within a specific timeframe.
When re downloading doesn’t work, try opening the file in different software. Sometimes one program can read a slightly corrupted file that another program rejects. Embird Viewer, which is free, can often open problematic files and allow you to save them in a different format, potentially fixing minor corruption.
Missing sections or incomplete designs might indicate the file was created or saved improperly. Professional embroidery software often includes file repair tools that can identify and fix common problems like missing color stops, excessive jump stitches, or improper termination commands.
For valuable designs that won’t open anywhere, consider sending them to a professional digitizing service. Many can recover corrupted files or recreate designs from images if the original file is beyond repair. This service typically costs $25-50 but can save designs you’ve invested significant money in purchasing or time in creating.