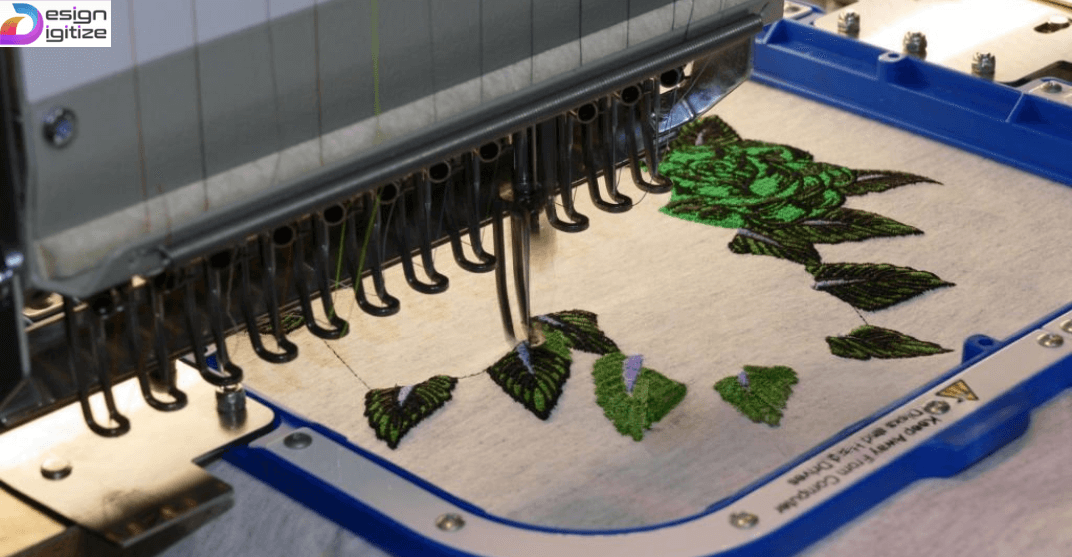
Embroidery digitizing is a technique of turning an image file or artwork into stitch file that can be read by an embroidery machines.
Digitizing an embroidery design was originally called “punching” because the information about the stitches in a design indicated by a tape with holes.
Types of Stitches in Embroidery Digitizing
In this process, different types of stitches are used to create textures, shapes, outlines, and visual effects. Understanding these stitch types is essential for achieving high-quality results. While there are many specialty many types of stitches, most embroidery designs are built from three main stitch types running stitch, satin stitch, and fill stitch along with their numerous subtypes.
1. Running Stitch
The running stitch, also called a straight stitch, is the simplest and most usefull stitch in embroidery digitizing. It consists of single stitches placed in a line and is mainly used for outlines, fine details, and underlay. It is also ideal for small text and delicate designs.
2. Satin Stitch
The satin stitch, also known as a column stitch, is created by placing stitches closely side-by-side to produce a smooth, shiny finish. It is ideal for lettering, borders, and narrow shapes. Satin stitches add a polished look and are commonly used in logo embroidery.
3. Fill Stitch
The fill stitch, also known as tatami or step stitch, is used to cover large areas with uniform stitching. It is made up of rows of running stitches placed at varying angles to create a solid texture. Fill stitches are perfect for backgrounds, large shapes, and bold logo elements
Types of Embroidery Logos and Their Standard Sizes
In embroidery, logos are customized not only by design but also by placement, purpose, and style. Different logo types require different digitizing techniques and sizes to maintain clarity and quality. Choosing the right size is crucial too large can distort the design, while too small can cause loss of detail. Below are the most common embroidered logo types and their recommended sizes.
1. Left Chest Logo
The left chest logo is the most popular placement for company uniforms, polo shirts, and T-shirts. It is positioned on the upper left side of the garment and is perfect for branding without being overpowering.
Best Use: Corporate uniforms, polo shirts, workwear, sportswear.
Recommended Size: 3.5″ to 4″ wide and proportionate height (usually 2″ to 2.5″).
Digitizing Tip: Keep small text at least 0.25″ high to remain readable in embroidery.
2. Jacket Back Logo
The jacket back logo is designed to make a bold statement. It covers a large area and is perfect for maximum brand visibility.
Best Use: Sports teams, biker jackets, promotional jackets, outerwear branding.
Recommended Size: 10″ to 12″ wide and proportional height (can be up to 14″).
Digitizing Tip: Use proper underlay to support large stitch areas and prevent puckering.
3. Cap / Hat Logo
Cap logos are small but impactful. The curved surface of caps requires special digitizing to ensure the design stitches cleanly without distortion.
Best Use: Baseball caps, trucker hats, promotional headwear.
Recommended Size: 2″ to 2.5″ high and up to 4″ wide for front panels.
Digitizing Tip: Use center-out stitching sequence to avoid misalignment.
4. Appliqué Logo
Appliqué is a technique where fabric pieces are stitched onto the garment and outlined with embroidery. It gives a textured, layered look and reduces stitch count for large designs.
Best Use: Sports jerseys, varsity jackets, hoodies.
Recommended Size: Varies, but typically large areas (6″ to 12″) for bold designs.
Digitizing Tip: Ensure precise tack-down stitches to prevent fabric fraying.
5. 3D Puff Logo
3D Puff logo is a special embroidery style that makes your design look raised and three-dimensional. It’s done by placing a piece of foam on the fabric before stitching. The stitches are sewn over the foam, and as the thread covers it, the design from the surface.
This technique is most popular for bold letters and simple shapes because it creates a thick, eye-catching effect. You’ll often see 3D puff embroidery on baseball caps, jackets, and hoodies.
Best Use: Caps, hoodies, jackets where bold, textured lettering is desired.
Recommended Size: Letters should be at least 0.25″ thick; overall size depends on placement (often 2″ to 4″ wide).
Digitizing Tip: Avoid thin lines; use satin stitch with proper density to cover foam completely.
Conclusion
Embroidery digitizing is more than just turning an image into stitches. it’s about choosing the right stitch type and logo style to make a design look its best. From the clean lines of a running stitch to the bold look of a 3D puff logo, every choice affects how your embroidery turns out. The right size and placement keep the design clear, durable, and professional, whether it’s a small left chest logo on a polo shirt or a large jacket back design. By understanding these stitch types and logo styles, you can create embroidery that not only stands out but also lasts for years.